Tip of the Week: Dos and Don’ts of Fidgets

This week, Different Roads is proud to share some tips from Nancy Hammill and Understood on the dos and don’ts of fidgets, both in the classroom and at home!

squidgy.jpg

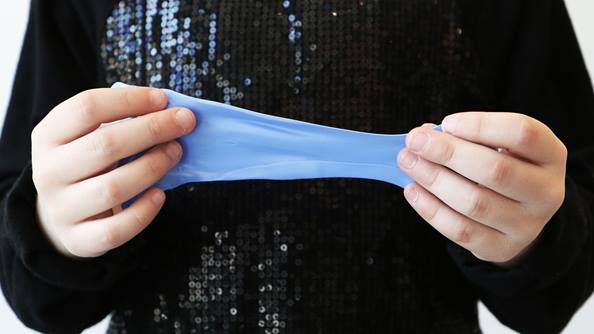
Fidgets, like squeeze balls and key chains, are self-regulation tools that promote movement and tactile input. They can be great for kids who struggle with attention, focus and sensory processing.

But in my many years as a teacher and parent, I’ve often seen them misused. When I see a child throw a squeeze ball across the room or obsess over making shapes out of Silly Putty, I know something’s gone wrong.

The problem is we often hand fidgets to kids without any direction, thinking they’ll magically know how to use them. Then when they play with them—rather than use them as a tool—we get angry.

That’s why it’s important to teach kids how to use fidgets. Here’s what I suggest.

First, explain to your child that a fidget is one strategy in her “tool kit” to help her improve focus on a task. When used correctly in the right situation, fidgets can help her be a better listener, sustain attention on her work, and even calm down or slow down her body and mind.

Basically, a fidget is a tool to help her focus—not a toy.

Second, work with your child to identify specific times she might need a fidget. For example, she might need it when she’s doing homework or needs to sit still in a movie theater.

Third, set up clear rules for how to use fidgets in your home, and communicate them to your child. If you’re unsure where to start, here are my “non-negotiables”:

Rule #1: Be mindful. Before you grab a fidget, think about whether you need it. If you don’t know, review rule #2.

Rule #2: You can only use a fidget to help with focus and attention or to calm down. Otherwise it will be taken away.

Rule #3: Don’t use a fidget if it distracts others or interferes with the work others are doing. If the fidget does distract others or interfere with their work, use a different fidget or strategy.

Rule #4: Every time you’re done with a fidget, put it back where it belongs. (In our house, we keep fidgets in a designated basket.)

If you want to try a fidget with your child, there are many options to choose from. Experiment to find what works best for your child. But I recommend that you don’t get a fidget that has a cute face or that looks like a toy. Your child needs to remember that fidgets are tools.

When you’re ready, you can set up a fidget basket (or other spot), print the rules, and put the rules in a place where your child can easily see and review them.


ABOUT THE AUTHOR

Nancy Hammill is the 2016 National Learning Disabilities Educator of the Year, awarded by Understood founding partner the Learning Disabilities Association of America. She has 20 years of experience as a classroom teacher, literacy specialist and learning therapist.

About Understood: The professionals who advise parents on Understood are all experts in their fields. They include educators, learning and attention specialists, physicians, psychologists, lawyers and more. They share a commitment to children with learning and attention issues.

Focus on Generalization and Maintenance

On more than one occasion, I’ve been in the situation that a student will only demonstrate a skill in my presence. And I’ve heard from other colleagues that they have had similar experiences. This is highly problematic. When it happens with one of my students, there is only one person I can blame: myself.  A skill that a student can only demonstrate in my presence is a pretty useless skill and does nothing to promote independence.

So what do you do when you find yourself in this situation? You reteach, with a focus on generalization. This means that, from the very beginning, you are teaching with a wide variety of materials, varying your instructions, asking other adults to help teach the skill, and demonstrating its use in a variety of environments. Preparing activities takes more time on the front-end for the teacher, but saves a ton of time later because your student is more likely to actually master the skill. (Generalization, after all, does show true mastery.)

Hopefully, you don’t have to do this, though. Hopefully, you’ve focused on generalization from the first time you taught the skill. You may see generalization built into materials you already use, such as 300-Noun List at AVB press.

Another commonly cited issue teachers of children with autism encounter is failure to maintain a skill. In my mind, generalization and maintenance go hand-in-hand, in that they require you to plan ahead and consider how, when, and where you will practice acquired skills. Here are a few tips that may help you with maintenance of skills:

  • Create notecards of all mastered skills. During the course of a session, go through the notecards and set aside any missed questions or activities. You might need to do booster sessions on these. (This can also be an opportunity for extending generalization by presenting the questions with different materials, phrases, environments, or people.)
  • Set an alert on your phone to remind you to do a maintenance test two weeks, four weeks, and eight weeks after the student has mastered the skill.
  • Create a space on your data sheets for maintenance tasks to help you remember not only to build maintenance into your programs, but also to take data on maintenance.

Considering generalization and maintenance from the outset of any teaching procedure is incredibly important. Often, when working with students with special needs, we are working with students who are already one or more grade levels behind their typically developing peers. Failing to teach generalization and maintenance, then having to reteach, is a waste of your students’ time.

WRITTEN BY SAM BLANCO, MSED, BCBA

Sam is an ABA provider for students ages 3-15 in NYC. Working in education for twelve years with students with Autism Spectrum Disorders and other developmental delays, Sam utilizes strategies for achieving a multitude of academic, behavior, and social goals. Sam is currently a PhD candidate in Applied Behavior Analysis at Endicott College. She is also a lecturer in the ABA program at The Sage Colleges.


Tip of the Week: Using Economy of Language in Your Teaching

Sometimes our learners don’t comply with instructions simply because they don’t fully understand what we are asking of them. At times, I find myself making the error of using too many words when I give directions, especially if I’m in a rush during a transition. For instance, I might say “Grab your shoes, put them on, and meet me by the door.” A few seconds later my learner meets me at the door, but with no shoes.

I may feel frustrated or irritated, but ultimately I realize my instructions are provided in a poor manner. I am at fault! It would have been more effective to point towards the shoes and say “Shoes on.” In his book Teach Like A Champion, Doug Lemov refers to this as Economy of Language, a phrase that essentially means the fewer words you use, the clearer your message. (It should be noted here that Teach Like A Champion is written for ALL teachers, not just special education teachers. This is a strategy that works across the board!) This is especially true when working with learners who struggle with listening comprehension, attention, or multi-step directions.

Here are a few suggestions to help you with economy of language:

Plan ahead. I actually write out instructions that I will be providing often and plan precisely how I will be giving them. I might plan a few variations, but, especially when working with young learners with autism, I want to provide lots of opportunities for success, then build to more complex instructions.
Consider hand signals. I often pair a hand signal with an instruction. For instance, one of my current students often sticks his fingers in his nose during instruction. I pair “Hands down” with a hand motion in which I move my hand from about shoulder-height to my lap (down). This is helpful because the learner also comprehends the signal, and I can begin providing the signal without the vocal statement. This allows me to provide instructions without interrupting the lesson.
One step at a time. Be aware of your learner’s listening comprehension and attending skills. If you notice that your learner is often only completing the first or the last thing you asked, this is a good indication that you provided too many instructions at the same time.
Avoid lengthy explanations. Sometimes I’ll hear an adult say something like “You need to hurry up and put your shoes on because your father is going to be here in a moment and we need to meet him outside and get in the car quickly so you’re not late for swim practice.” This is an easy trap to fall into, especially if vocalizing the explanation is helping you remember everything you need to do during a transition, but it may result in inaction from your learner.
Take a deep breath. If your learner is not responding correctly to instructions you’ve provided, step back, take a deep breath, and think about how to simplify the instruction.

WRITTEN BY SAM BLANCO, MSED, BCBA

Sam is an ABA provider for students ages 3-15 in NYC. Working in education for twelve years with students with Autism Spectrum Disorders and other developmental delays, Sam utilizes strategies for achieving a multitude of academic, behavior, and social goals. Sam is currently a PhD candidate in Applied Behavior Analysis at Endicott College. She is also a lecturer in the ABA program at The Sage Colleges.

Tip of the Week: Measure Group Behavior in the Classroom

Many classroom teachers are required to take data on the behavior of their students. However, this can feel like a daunting task given the many things teachers are trying to do simultaneously throughout the day! PLACHECK is a simple way to measure group behavior in the classroom for engagement or attention.

PLACHECK is short for Planned Activity Check. Let’s say that Ms. Esterman is using a partner activity for a math lesson for the first time in her fourth grade classroom. She wants to see if the kids remain engaged with the content during the partner activity. Here is how she can implement PLACHECK to collect data on engagement.

  1. Measure Group Behavior in the ClassroomSet a MotivAider for a predetermined interval (learn more about the MotivAider). The partner activity Ms. Esterman has organized will take a total of ten minutes. She decides to set the MotivAider for 2 minute intervals.
  2. At the start of the lesson, set the MotivAider to run and clip it to your waistband. For Ms. Esterman, the MotivAider will vibrate every two minutes to signal her to observe her students.
  3. When the MotivAider vibrates, collect tally data. Ms. Esterman feels the MotivAider vibrate, then quickly counts the number of students who are engaged in the partner activity.
  4. Continue to do this for each interval.
  5. Graph your data.

Ms. Esterman’s graph looks like this for her 24 students:

PLACHECK Graph 1

The next day, Ms. Esterman does a similar activity with her students, but uses an independent activity instead of a partner activity. She uses the same 5 steps to use PLACHECK to measure student engagement in the independent activity. Now she can easily compare engagement between the two types of activities. You can see both days graphed below:

PLACHECK Graph 2

When she compares the two days, she finds these results, and it allows her to make better decisions about what types of activities might work best for the individuals in her classroom. Here, it is clear that between these two activities, her students were more likely to be on task during partner work. However, Ms. Esterman would attain better results by taking more data.

PLACHECK is simple to implement. Ms. Esterman is able to collect this data in less than two minutes each day and can learn a lot from just that brief time.

WRITTEN BY SAM BLANCO, MSED, BCBA

Sam is an ABA provider for students ages 3-15 in NYC. Working in education for twelve years with students with Autism Spectrum Disorders and other developmental delays, Sam utilizes strategies for achieving a multitude of academic, behavior, and social goals. Sam is currently a PhD candidate in Applied Behavior Analysis at Endicott College. She is also a lecturer in the ABA program at The Sage Colleges.

Tip of the Week: How to Maintain a Fast Pace of Instruction

There is a common misconception that individuals with special needs require a slower pace of instruction. While they may require a slower pace through a curriculum, this does not mean that individual lessons should be taught at a slower pace. In fact, slowing the pace of instruction not only wastes precious instructional time, it may increase the occurrence of problem behaviors.

Higbee (2009) writes that “appropriately paced instruction helps students to maintain attention to the instructor and instructional materials. Though student attention can be lost when instruction is happening too rapidly, it is most often lost when the pace of instruction is not rapid enough” (p. 20).

So how can you maintain a fast pace of instruction that is appropriate for your student? Here are some things to consider:

  1. Prepare! Set out your materials in such a way that they are easy to access quickly. I keep all the mastered skills on index cards so I can easily add maintenance questions into instruction. Organization is often the simplest way to increase efficiency in your session.
  2. Take data. You want to increase attention and decrease problem behaviors. Try different paces of instruction and measure the behaviors you are wanting to change. For instance, if I have a student who is often grabbing for my shirt during a session, I may try a pace of instruction that includes 15 questions each minute, then try a pace of 20 questions per minute, another of 25 per minute. Next, I will compare the rates of grabbing for my shirt with each pace of instruction. Remember, these aren’t 15 questions for the target skill; some mastered skills will be intermixed.
  3. Record a session. By taking video of yourself working with a child, you may see opportunities for increasing efficiency on your own. You may also observe specific times at which problem behaviors tend to increase, then be able to target those specifically. For instance, perhaps problem behaviors occur when you turn to write data in a binder, but didn’t recognize that pattern until you watched a recording later.
  4. Use reinforcement effectively. Usually, pace of instruction in and of itself will not change behavior. Instead, pair it with reinforcement and be systematic with how you implement reinforcement. We’ve talked about reinforcement here on the blog a lot, so you can read about that in more detail here.
  5. If possible, get input from supervisors or the individual you are working with. Supervisors may be able to observe your session and provide insight on how to increase your pace of instruction. And the individual you are working with may be communicating that they are bored through misbehavior, stating “I’m bored,” or nonvocal behaviors such as yawning. This may be an indication that you need to provide more challenging material or increase the pace of instruction.

REFERENCES

Higbee, T. (2009). Establishing the prerequisites for normal language. In R. A. Rehfeldt, Y. Barnes-Holmes, & S.C. Hayes (Eds.), Derived relational responding applications for learners with autism and other developmental disabilities: A progressive guide to change (7-24). Oakland, CA: New Harbinger Publications, Inc.

WRITTEN BY SAM BLANCO, MSED, BCBA

Sam is an ABA provider for students ages 3-12 in NYC. Working in education for ten years with students with Autism Spectrum Disorders and other developmental delays, Sam has developed strategies for achieving a multitude of academic, behavior, and social goals. Sam is currently pursuing her PhD in Applied Behavior Analysis at Endicott College.