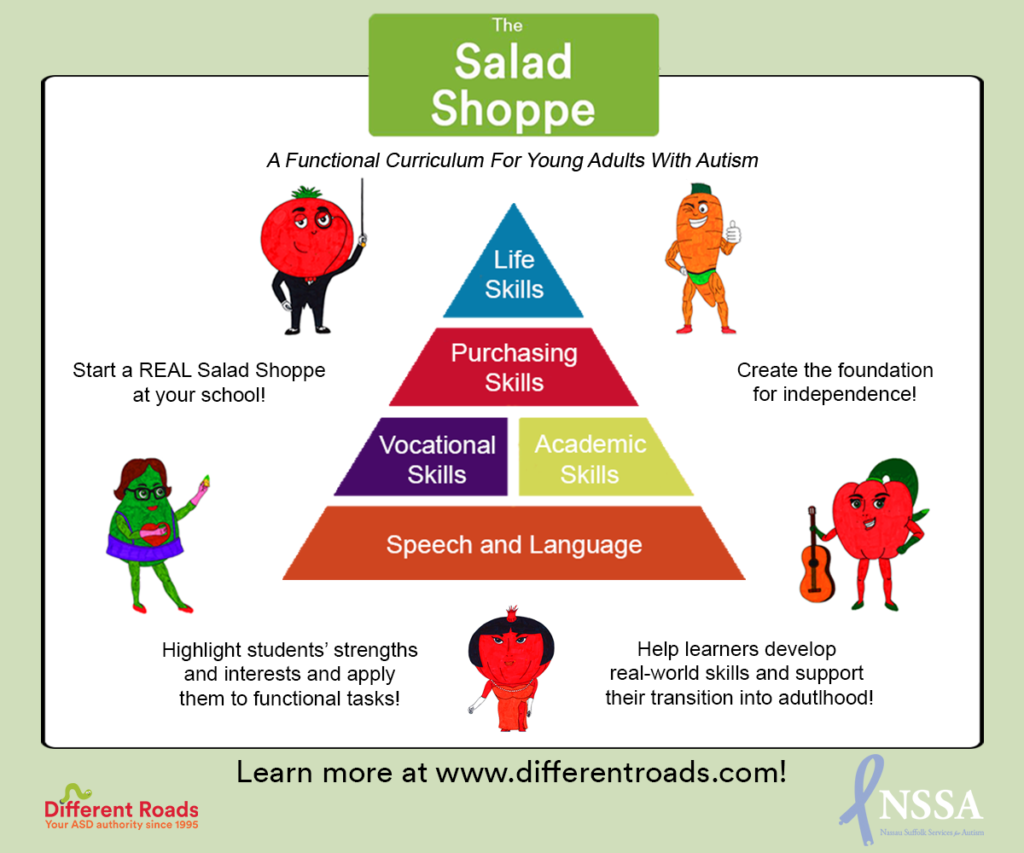
This week, save 15% on our brand new vocational curriculum! Click on the graphic for more details!
This week, save 15% on our brand new vocational curriculum! Click on the graphic for more details!
There is a common misconception that individuals with special needs require a slower pace of instruction. While they may require a slower pace through a curriculum, this does not mean that individual lessons should be taught at a slower pace. In fact, slowing the pace of instruction not only wastes precious instructional time, it may increase the occurrence of problem behaviors.
Higbee (2009) writes that “appropriately paced instruction helps students to maintain attention to the instructor and instructional materials. Though student attention can be lost when instruction is happening too rapidly, it is most often lost when the pace of instruction is not rapid enough” (p. 20).
So how can you maintain a fast pace of instruction that is appropriate for your student? Here are some things to consider:
Higbee, T. (2009). Establishing the prerequisites for normal language. In R. A. Rehfeldt, Y. Barnes-Holmes, & S.C. Hayes (Eds.), Derived relational responding applications for learners with autism and other developmental disabilities: A progressive guide to change (7-24). Oakland, CA: New Harbinger Publications, Inc.
Sam is an ABA provider for students ages 3-15 in NYC. Working in education for twelve years with students with Autism Spectrum Disorders and other developmental delays, Sam utilizes strategies for achieving a multitude of academic, behavior, and social goals. She is also an assistant professor in the ABA program at The Sage Colleges.
Prompts are ways we help our learners demonstrate new skills. We use prompts to get our students to greet a peer, flush the toilet, name the color blue, and clap their hands. Prompts are something we add to the situation because the natural or teaching cue was not enough to cause the student to respond. The natural cue of being finished using the toilet was not a strong enough reminder to flush the toilet so we added the verbal prompt, “flush the toilet” and the student now responds. Prompts are important but fading them is just as important. Prompt fading in ABA needs to be planned from the start and is an integral and essential component to the plan. Unless you are committing to following that child around for the rest of his life and tell him to flush the toilet – prompt fading is essential.
* Plan it out from the start.
* Train your staff.
* Do it gradually.
* If incorrect responding begins, return to last prompt level.
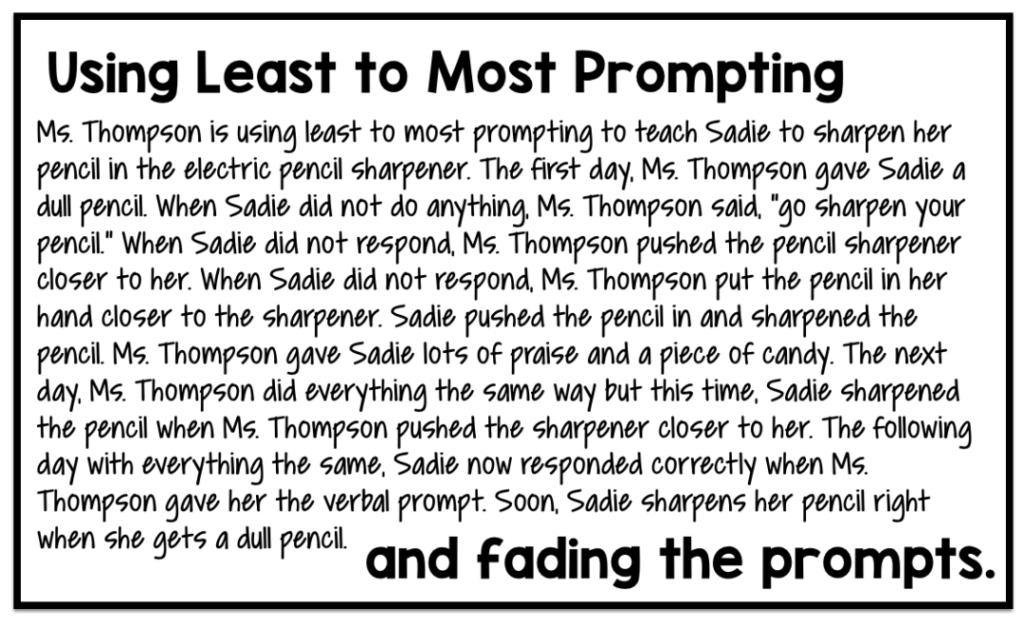
Like we discussed in Monday’s post, least to most prompting involves starting with the least intrusive prompts and moving up in the prompting hierarchy. This can be beneficial because it gives students to the opportunity to be independent and you are only providing as much prompting as needed. This is a strategy we tend to use naturally. When you meet a your friend’s toddler you put out your hand to give a high five. If she doesn’t respond you say, “give high five.” If she still doesn’t respond you move her hand to your hand to give a high five. This is a natural method of prompting. When using this prompt fading technique, ideally the prompts will be somewhat self fading. If you are always starting at the least intrusive prompt, your students will have the opportunity to demonstrate independence. As the student begins to learn the task, he will need less and less prompts to perform it correctly.
Most to Least prompt fading is another effective method of using prompts. With this method you start the most intrusive prompts and gradually fade to less intrusive prompts. The prompt fading is build right in. However, sometimes people forget that and in their head rename this most to most prompting. The key to errorless learning and using the most intrusive prompts first is that you fade the prompts out. The idea behind most to least prompting is that students will contact reinforcement right away and you will avoid errors and the students developing any incorrect habits.
Data is critically important for avoiding prompt dependence. You want to set a criteria ahead of time and take data to make sure you are sticking with the criteria. The criteria you set will depend on the student and the task. Maybe you want 3 consecutive days with each prompt level. If you are taking data you can ensure that you are sticking to that schedule. If errors begin occurring, go back a prompt level. The data will guide your implementation of this procedure. If you are fading too quickly, your data will tell you!

Prompt fading in ABA isn’t scary. Plan ahead and make sure you train your staff. This is a group endeavor!

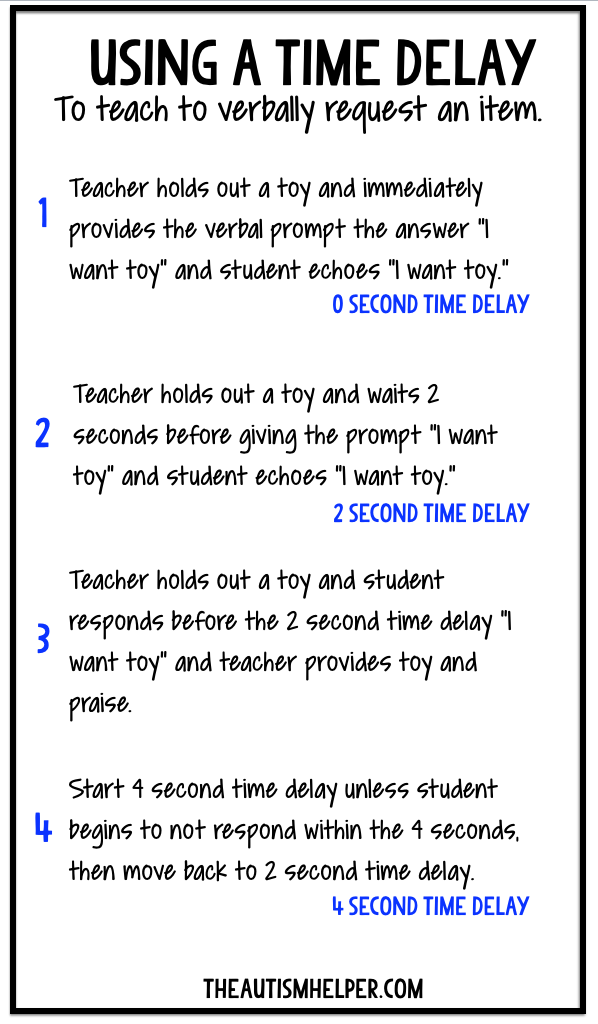
One effective way we can fade prompts is using a time delay. A time delay inserts a set amount of time between the natural or teaching cue and our prompt. When utilizing a time delay, start with a zero second (i.e. no) time delay – so it will basically be like errorless teaching. For the first few trials, give the prompt right away so the student knows how to respond. Then after several trials, increase the time delay. For example, you may start with 2 seconds. If the student does not respond within 2 seconds – provide the prompt. If the student responds before the 2 seconds, provide loads of reinforcement. Once the student is successful and responding under the 2 seconds for several trials, increase the time delay. Now wait until 4 seconds to provide the prompt. Continue on. If the student does not respond with the 4 second time delay, move back to the 2 second time delay.
The key to time delay is planning and data. Set the criterion ahead of time. Plan how many sessions you will do at 0 seconds before moving to the first time delay. Determine what the mastery criteria is – how many times do you want the student to respond within the time delay before increasing the time delay length? Take data on this. It can easily and quickly get confusing if you don’t have a data sheet to track what you are doing. Write the plan in simple terms at the top of your data sheet. I like to track prompted correct (PC), prompted incorrect (PI), unprompted correct (UC), and unprompted incorrect (UI) using those abbreviations on my data sheet. If the student responds before the prompt it is counted as unprompted and if it’s after the prompt it is prompted!
There is no magic number of trials or days you should stay within the 0 second or 2 second time delay. It depends on the student’s level of functioning and the difficulty of the task. This is where data majorly comes in to play. If you’ve moved along too quickly, you will know and you can scale back.
Time delay works really well with verbal prompts. Another key component to time delay working successfully is making sure the reinforcement you give for the unprompted responses is better than the reinforcement for prompted responses. So if Johnny responds before the time delay and says the color blue on his own – give him 3 m&ms and praise but if you are using a 2 second time delay and he doesn’t respond and you provide the verbal prompt “bl…” and then he says blue only provide praise. You want the independent responses to be getting more reinforcement so your student is motivated to engage in those responses more!
Sasha Long, BCBA, M.A., is the founder and president of The Autism Helper, Inc. She is a board certified behavior analyst and certified special education teacher. After ten years of teaching in a self-contained special education classroom, Sasha now works full time as a consultant, writer, and behavior analyst. Sasha manages and writes The Autism Helper Blog, as a way to share easy to use and ready to implement strategies and ideas. Sasha also travels internationally as a speaker and consultant providing individualized training and feedback to parents, educators, therapists and administrators in the world of autism. She is currently an adjunct professor in the school of Applied Behavior Analysis at The Chicago School of Professional Psychology. Sasha received her undergraduate degree in Special Education from Miami University and has a Masters Degree in Applied Behavior Analysis from The Chicago School of Professional Psychology. Contact Sasha at sasha.theautismhelper@gmail.com.
A new therapy program called Hoof Prints in the Sand services individuals with special needs ranging from ages 5 to 63. This animal based therapy program is aimed at using interactions with horses to help individuals gain not only physical skills like muscle definition, correct posture and hand-eye coordination but also much-needed confidence.
Founded by a special education teacher with an equestrian background the entire Hoof Prints in the Sand program consists of volunteers who dedicate their time to work one on one with students of varying disabilities and ages. Students begin by testing out a mechanical horse appropriately named “Hope” and then easing into riding lessons on donated horses. The volunteer coaches help students by riding with them, leading the horses, or walking beside the horse and rider to ensure safety.
Do you know of a unique program for individuals with special needs in your area?
With all the new advances in technology some adults with disabilities are finding new ways to put them to use enabling them to gain independence and begin living on their own. A new article details life outside of assisted living and group homes to a new 24-hour monitored independent-living housing situation. A new system called Sengistics is able to monitor programmed activities of a household 24 hours a day. For example things like doors and windows opening after specifically programmed hours can trigger a phone call to a caretaker allowing the caretaker to check-in with the individual moments later. Other features that can be programmed include motion sensors for areas of the house alerting caretakers of possible injuries and accidents, alert systems for appliances to make sure they are secured properly after use, alerts for medications ensuring they are taken on the correct schedule as well as a variety of other individualized monitors that can be programmed to call and notify different contacts.
This type of living situation is ideal for those who cannot live in a fully independent housing situation but who are generally over-served in assisted living homes. It also fosters the use of previously learned living skills as well as helps by giving the individual the opportunity to acquire new sets of skills ranging from simple chores to shopping lists, money management and more. Lastly, for parents with adult children who continually need support and are unable to live fully independent lives this new type of housing situations enables them to gain a piece of mind about the future.
To learn more about the monitoring system and its features click on the following article:
Happy New Year! Many people are inspired by the start of the new year to set goals for themselves. This is also an ideal time for parents to think about their goals for their children. In setting goals for a child with a disability, there are a few important considerations that will improve the likelihood of the child’s success, as well as the parent’s satisfaction.
It’s usually a good idea to start with big picture goals, and then narrow them down. You might start by asking yourself what your ultimate goal for your child is, and then where you would like to see him or her in 5 years. Then, what would you like to be accomplished in this coming year?
Let’s say your big picture goal is for your son to have a happy social life. Your 5-year goal might then be for him to have at least 3 friends that he sees on a regular basis. Your goal for this year might be to get him involved in an afterschool club on a regular basis.
To take another example, your big picture goal might be for your daughter to communicate effectively with other people. Your 5-year goal might be for her to have conversational exchanges with other people in the absence of prompts or augmentative communication. And your goal for this year might be for her to ask for what she wants when she wants it (to “mand” for desired objects).
Starting with the big picture goal and thinking about the 5-year goal can help parents to maintain their focus. If you start with small goals and build up, you might find yourself building in the wrong direction. Most importantly, keeping the big picture and 5-year goals in mind help to keep your more immediate goals functional and meaningful. When time and resources are precious, you want to make sure that you use them only to address goals that are going to help your child to attain his or her best, most important possible outcomes.
A second consideration in setting year-long goals is how realistic they are. No one knows your child better than you, as his or her parent, but even parents can have difficulty gauging just where their child may wind up after a year. Many factors can impact the success of any goal, including the interventions available and other, unexpected barriers or supports that may arise. It can be helpful to break year-long goals down even further into smaller steps, which will be easier to predict and monitor.
So, for the son who you want to see be more social, consider breaking the goal of joining an afterschool club down into its parts, each of which will be easier and faster for him to accomplish than the whole: investigate the clubs that are available, discuss his top two choices with a guidance counselor, attend the first meeting, etc. Each of these smaller goals can be measured and celebrated, helping to keep momentum and motivation towards the bigger year-long and further aspirations. Similarly, the daughter who is working on communication can achieve smaller goals by learning to mand using prompts as earlier goals, and then continuing to mand independently as prompts are faded.
Finally, each of the smaller goals set for the year should be measured so that progress can be tracked. Seeing progress is not only motivating and exciting, but can help to guide when to advance to the next set of goals. Measurement is also important for identifying when progress is not happening as quickly as desired, so that the supports and strategies in place can be updated for better success.
About The Author
Dana Reinecke is a doctoral level Board-Certified Behavior Analyst (BCBA-D) and a New York State Licensed Behavior Analyst (LBA). Dana is an Assistant Professor and Department Chair of the Department of Special Education and Literacy at Long Island University Post. Dana provides training and consultation to school districts, private schools, agencies, and families for individuals with disabilities. She has presented original research and workshops on the treatment of autism and applications of ABA at regional, national, and international conferences. She has published her research in peer-reviewed journals, written chapters in published books, and co-edited books on ABA and autism. Current areas of research include use of technology to support students with and without disabilities, self-management training of college students with disabilities, and online teaching strategies for effective college and graduate education. Dana is actively involved in the New York State Association for Behavior Analysis (NYSABA), and is currently serving as President (2017-2018).


Fidgets, like squeeze balls and key chains, are self-regulation tools that promote movement and tactile input. They can be great for kids who struggle with attention, focus and sensory processing.
But in my many years as a teacher and parent, I’ve often seen them misused. When I see a child throw a squeeze ball across the room or obsess over making shapes out of Silly Putty, I know something’s gone wrong.
The problem is we often hand fidgets to kids without any direction, thinking they’ll magically know how to use them. Then when they play with them—rather than use them as a tool—we get angry.
That’s why it’s important to teach kids how to use fidgets. Here’s what I suggest.
First, explain to your child that a fidget is one strategy in her “tool kit” to help her improve focus on a task. When used correctly in the right situation, fidgets can help her be a better listener, sustain attention on her work, and even calm down or slow down her body and mind.
Basically, a fidget is a tool to help her focus—not a toy.
Second, work with your child to identify specific times she might need a fidget. For example, she might need it when she’s doing homework or needs to sit still in a movie theater.
Third, set up clear rules for how to use fidgets in your home, and communicate them to your child. If you’re unsure where to start, here are my “non-negotiables”:
Rule #1: Be mindful. Before you grab a fidget, think about whether you need it. If you don’t know, review rule #2.
Rule #2: You can only use a fidget to help with focus and attention or to calm down. Otherwise it will be taken away.
Rule #3: Don’t use a fidget if it distracts others or interferes with the work others are doing. If the fidget does distract others or interfere with their work, use a different fidget or strategy.
Rule #4: Every time you’re done with a fidget, put it back where it belongs. (In our house, we keep fidgets in a designated basket.)
If you want to try a fidget with your child, there are many options to choose from. Experiment to find what works best for your child. But I recommend that you don’t get a fidget that has a cute face or that looks like a toy. Your child needs to remember that fidgets are tools.
When you’re ready, you can set up a fidget basket (or other spot), print the rules, and put the rules in a place where your child can easily see and review them.
Nancy Hammill is the 2016 National Learning Disabilities Educator of the Year, awarded by Understood founding partner the Learning Disabilities Association of America. She has 20 years of experience as a classroom teacher, literacy specialist and learning therapist.
About Understood: The professionals who advise parents on Understood are all experts in their fields. They include educators, learning and attention specialists, physicians, psychologists, lawyers and more. They share a commitment to children with learning and attention issues.
For students on the Autism spectrum, having a strong and reliable therapy team to support individual needs can be an important factor in student success. When members of a therapy team are collaborating seamlessly, a student is more likely to have high quality support across all areas of development (communication, social, cognitive, play, motor, and adaptive skills).
 The pervasive nature of ASD across these areas means that multiple disciplines are necessarily involved in effective intervention (Donaldson and Stahmer, 2014). When we work together and have a narrow focus, we can help our students make a great deal of progress. Gone are the days of a Speech Language Pathologist, Physical Therapist or Occupational Therapist taking a student away for traditional pull out therapy and leaving no time for debriefing with the classroom team.
Who comprises the therapy team is determined on a case-by-case basis. You may be wondering where to start with this sometimes daunting task of building a strong and supportive team. Below I will discuss some strategies that are evidenced-based and the ways that I incorporate them into my busy life as a speech language pathologist.
Pairing
One of the first things that I always try to do is build rapport with staff, which is known as a behavioral principle called pairing. It is important to build rapport and/or pair with team members, especially if you are new to the team or if other new members have joined. It may sound like very basic advice, but as clinicians we are very busy and sometimes we feel that we do not have time for this piece. I am urging you to put this time with staff on the top of your priority list. Once you have a good rapport with team members, it allows you to share ideas and collaborate more easily and more effectively.
Sharing
The next tip I have is to share the goals your student is working on. If you are the teacher, share the student’s IEP goals with the paraprofessionals and explain why you are teaching particular tasks. Knowledge is power! If you are the occupational therapist, please share your student’s therapy goals with the team. Therapy takes place all day, across settings and across instructors. If the team does not know what the goals are, they will have no idea how to address them across the school day.
Reinforcement
Students and professionals benefit from reinforcement! People feel good about the work at hand when they receive positive reinforcement. Let the paraprofessional know that they are doing a great job with their student(s). Everyone likes to get praise for a job well done!
Data
Another way that we can assure that our collaboration is helping the student is by collecting daily data on skills from all domains (i.e. behavior, academic, communication). When we, as a team, create a data sheet that captures the skills and specific targets we are addressing, we can use this across the student’s day. When we take this data and analyze the progress, we can all make informed decisions about a student’s programming needs. I have included a free team-based daily data sheet from Stages Learning. You can use this data sheet to track a variety of skills.
In my 14 years practicing in the field, the majority of people that I encounter are driven by a desire to see their students. However, even with the best intentions, we may face barriers in collaborating with other staff members. Follow the tips mentioned above and reach out to colleagues who seem to need additional support. I try to continually assess the needs of the teams I work with throughout the year. Maybe the team needs a refresher on a certain skill area – see if you can work this into your yearly professional development time. When we work together as a team, we can help so many students achieve their goals!
 Rosemarie Griffin, MA, CCC-SLP, BCBA is a licensed speech language pathologist and board certified behavior analyst. Currently she splits her time between a public school system and a private school for students with autism. She is passionate about lecturing on effective communication services for students with autism and has done so at the local and national level. Rosemarie also enjoys spending time with her family, playing the harp and shopping.

We’ve got all the tools you need to develop imaginative play skills with our favorite hands-on learning storybooks and games!
This week only, save 20% on your purchase of these select 2D to 3D learning tools by using promo code 3D2017 at checkout!