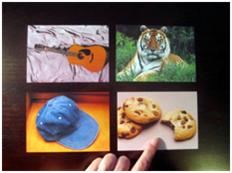
With our current pick of the week being the Language Builder Picture Cards, we thought this wonderful post outlining specific uses for the set from creator Angela Nelson would be most helpful.
The most popular use of the Language Builder Picture Card Series is to build vocabulary. The realistic and current photos help students to learn the name of various nouns, occupations, and emotions. In the beginning, this task can be very repetitive and basic, focusing only on learning single-word responses. When a child with autism begins to gain expressive language skills, parents and educators are thrilled to watch these new words emerge.
Labeling Sentences
After a child has mastered numerous single-word labels for the picture cards, the next critical step is to build these one-word answers into more complete and functional Labeling Sentences.
Building sentences will start simply. As a first step, you may just ask the child to use the article along with the word. For example, move toward an answer of “an apple” or “a car.” The next step would be to work toward “It is an apple,” or “It is a car.”
As you expand your student’s communication skills to include full sentences, you will no doubt need to use prompts in the beginning. The most common method is verbal modeling. But it is important to fade the verbal prompt as soon as possible. To help your student answer in full sentences without need for a verbal prompt, you can move to a visual cue prompt.
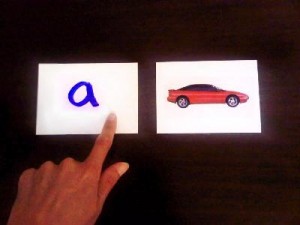 Written cue cards are a great method to remind your student to use full sentences. For example, if you show your student a picture of a car, and ask “What is it?” your student is likely to just answer “car.” To prompt your student to use the article “a” with the word car, you can start by putting a cue card in front of the picture with the word “a” on it. Have your student touch each card (the “a” card and then the picture card) as they say the words “a car.” The next step would be to add cue cards for “It is a car.” When your student starts to grasp the concept of speaking multi-word sentences, you can begin to fade the visual cue card prompts.
Requesting Sentences
Another important type of sentence that your child will need to learn to use is a Requesting Sentence. When your child learns to use communication to make requests and get their needs met, it will reduce the child’s frustration, which will in turn reduce the frequency of tantrums and outbursts.
Sort through the picture cards for which your child knows the labels. Find pictures of items that your child likes and that you have available to give to them. Food items are often the most successful to start with. For example: Cheese, Raisins, Juice, Popcorn, and Apple. Stick a magnet to the back of each picture and place the pictures on the refrigerator. Write the word “I” on one index card and the word “want” on another and place those on the refrigerator also. When you know your child wants a specific food (as most parents often do), pull the corresponding picture down into the “I want” sentence. Use the visual cues as a prompt to help your child remember to use the full sentence to request their desired food. As always, you should fade the prompts as your student begins to master this full sentence activity.
A Note on Using Cue Cards to Prompt
You may think: Why am I using written words to prompt my child? He isn’t speaking well, so why should I assume he can read?
The cards are not meant for your child to read. They are merely place markers. It makes as much sense to use the words as anything else. However, you could also use something as simple and nondescript such as blocks or blank cards for your child to touch as they say the words. The idea is to give your child a physical reminder to speak the extra words. In fact there are schools of thought suggesting that if you tie spoken words to physical activity that it creates more neural pathways for the words to attach to. Regardless, you can choose to use the word cards, or to use a more neutral object. Decide what works best for your child.
Additional Activities to Develop Sentence Skills
Labeling and Requesting are the most basic of all full sentence activities, and provide a basis for your student to understand that communication requires more than single word utterances. The following list of activities offers just a few examples of the many lessons you can use to help build full sentences and a more complete system of communication with your child.
Adjectives
You can use picture cards to discuss adjectives or descriptive words. Some adjectives are clear from the pictures, such as “the apple is round” or “the frog is green.” Other adjectives draw more on a child’s real-world experience, like “the bunny is soft” or “the banana is sweet.” To teach adjectives, you can start with a receptive task. Place cards in front of your child and ask them to “find something green” or “point to something that is round.” This receptive language activity will allow your student to hear some of the adjectives you use, before trying to come up with their own descriptive words when you start to build sentences with them.
To transition this activity to expressive language, you can hold up a picture and ask your student, “What color is the frog?” You will need to prompt your student at first either verbally or using a cue card method as described above.
Wh-questions
Picture cards provide a great opportunity to practice “Wh” questions. You can show your student a picture and ask him or her to answer questions such as “What color is the frog?” “Where would you find a plate?” “When do you use a pillow?” “Why do you use soap?”
To start, some of these questions will fall easily out of the Adjectives lessons you have already practiced, such as “What color is it?” Other questions will provide a new challenge for your student.
Tell Me About
Use pictures with which your student is already familiar. The best pictures will be the ones you have practiced extensively on the Adjectives and Wh-Questions. Show your student a picture and ask him or her to tell you about the item in the picture.
The first things that your student should be able to tell you about the pictures are the responses that they learned in Adjectives and Wh-Questions. The difference with this drill is that you student has to generate the content themselves rather than respond to your question. When you ask your student “What color is it?” they know color is the relevant detail. In the Tell Me About lesson, students have to decide for themselves that color is a relevant thing to tell you about the picture.
You can start with scripted responses, using the picture to cue your student. Then you can progress to more creative responses that might not be so obvious from the picture. For example, show your student a picture of a duck. Ask your student, “Can you tell me about a duck?” By looking at the picture, your student can get some basic answers. “A Duck has feathers.” “A duck has webbed feet.” “A duck has a bill.” As your student becomes more familiar with this activity, you may progress to things about a duck that are not readily apparent from the picture. “A duck can swim.’ “A duck says ‘quack quack,’” “A duck lays eggs.”
The Tell Me About Lesson also gives you the opportunity to increase the length of your student’s verbal activity. Start by requiring the student to tell you only one detail about the picture. Then move up to two, or three or more details. Of course, if you ask your student to tell you three things about the picture, you may have difficulty if they haven’t mastered counting skills. Here’s a trick: hand your student three blocks and have them toss a block into a bucket with every detail they tell you. This is a great way to help your student count their answers, and it makes it fun for them!
Storytelling
The next step in this language building series is Storytelling. Again, this activity builds on the previous lessons. Show your student a familiar picture card and ask your student to “Tell you a story” about the picture. The first elements of the story will likely be familiar from the Tell Me About lesson. For example:
“Tell me a story about a duck.”
“There was a duck, it had webbed feet, feathers, and a bill. The duck went for a swim in the pond, then it laid some eggs and said ‘quack quack’”
As your student’s language skills grow, so will the creativity of the stories!
Generalization
The setting in which you begin to teach language skills is very structured and formal. However these new skills will become more valuable as they generalize across time and setting, and with various communication partners. To help promote generalization, you can start by moving your therapy session to different places – starting even with different rooms in the house.
Next, it is important that the skills your child has learned in the formal therapy session be practiced throughout other aspects of the child’s life, such as during family time and at school. Make sure to bring the cardsto dinner, to the store, to school, etc. Whenever you communicate with your child, require the same full sentences that are expected during therapy. Stop and take the time to use the prompt cards if necessary.
Finally, keep good records and good communication channels open with all of the other professionals and family members in your child’s life. You can send a notebook back and forth to school, or perhaps start an electronic communication log to make sure teachers are requiring the same sentences, using the same words, and bringing in the same prompts as you are at home and in therapy. Consistency is a major key to building and generalizing successful language skills to help your child interact with the world around them.
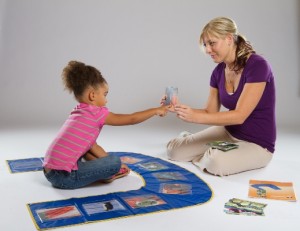 When you’re in one-on-one sessions and get down on the floor with the kids, wouldn’t it be wonderful to still have the benefits of a working surface that the child has complete visual and tactile access to? The brand new, innovative U-Play Mat is the answer! The U-shaped mat and 50 photo flashcards create a solid learning environment, promoting face-to-face interaction and eye contact.
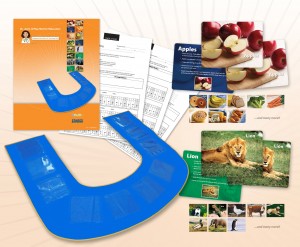 There are 10 clear pockets on the 4′ x 3′ mat which allows the child full visual and tactile access. The U-Play Mat comes with 2 decks of cards featuring Animals and Foods from the folks who brought you the Language Builder Picture Cards. Each deck has 50 cards with 25 matching pairs. Each card has a clear, photographic image with the corresponding label on one side, and fun facts on the reverse. These fun facts can serve as conversation starters to build interaction, vocabulary and language skills. You can also use the U-Play Mat with additional customized set of flashcards and images. There is a detailed Activity Guide for therapists, educators, and parents to organize and implement an education program. The guide comes complete with 19 custom-designed, reproducible data sheets to record responses and track progress.


