Pick of the Week: Token Towers – Reinforcing just got more fun!

We can never get enough reinforcement tools, especially for group settings. Help students meet behavioral or academic goals with these interactive Token Towers. And this week only, you can save 15%* on your set of the Token Towers, by using promo code TOKENTWR at check out.

Set goals using the colored ring and insert tokens as reinforcement for appropriate behaviors or correct responses. The hard plastic chips with smiley faces make a fun noise as they drop into the containers, which is almost as fun as watching the tokens pile up!

This kit includes four Token Towers (red, yellow, green, and blue) and 140 tokens (35 for each tower). Each Token Tower has target goal levels of 5, 10, 15, 20, 25, 30 and can hold a maximum of 35 tokens. The towers measure 6 ½” tall with tokens measuring 1 ½” in diameter. Recommended for children ages 3 and up.

Don’t forget! We’re featuring this newly added set of Token Towers as our Pick of the Week, so be sure to use promo code TOKENTWR to take 15% off* your order.

*Offer is valid until 11:59pm EST on October 28th, 2014. Not compatible with any other offers. Be sure there are no spaces or dashes in your code at check out!

Simplifying the Science: Using a MotivAider to Self-Monitor

Teaching independent on-task behavior can be quite challenging when working with any student, but particularly so with some students with autism. In a study published in 2010, researchers Dina Boccuzzi Legge, Ruth M. DeBar & Sheila R. Alber-Morgan implemented and evaluated one way of teaching student to self-monitor their on-task behavior using a MotivAider. (The MotivAider is a simple electronic device that vibrates at timed intervals to provide an individual with a private prompt to engage in a specific behavior. It can be programmed to vibrate on a fixed or variable schedule at different duration and intensity levels.)

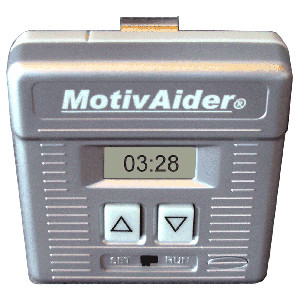
In this study, the researchers worked with a fifth grader with autism, a sixth grader with autism, and a fifth grader with cerebral palsy. They taught the boys to wear the MotivAider (calling it a pager) and note a + or a – to indicate their behavior each time the MotivAider vibrated. The behaviors they monitored were all related to being on-task: “eyes on my work,” “in my seat,” and “doing work.” Once each boy consistently rated his behavior upon feeling the vibration, the researchers implemented the intervention.

The MotivAider’s were initially set to vibrate every two minutes. Each time the MotivAider vibrated, the student would mark a + or a for each of the behaviors on a sheet he had on his desk. Prior to the intervention, the average percentages of time each boy was on-task ranged from 26% to 77%. Upon implementation of the intervention, “all three students showed an immediate and substantial increase of on-task behavior ranging consistently from 80% to 100%.

The researchers also included a plan for fading out the use of the MotivAider‘s, changing from a fixed schedule of every two minutes, to an increasing variable schedule. The fading schedules varied for each student. For example, for one student, the fading schedule started with a variable schedule of a vibration about every four minutes, then moved to about every six minutes, then to about every eight minutes, and then to about every ten minutes. The MotivAider was then removed completely.

After the intervention was complete, researchers collected data once a week for three weeks to see if the intervention was maintained. During all three maintenance probes, “all students continued to demonstrate 80%-100% on-task behavior.”

We’ve talked about how to use MotivAider‘s in the past, but I particularly love this intervention because it is feasible for teachers to implement in the classroom, promotes independence in learners with autism, and allows teachers to focus on other issues. Take a look at the study here to get a fuller description of how to implement such an intervention with your students.

For more information about the MotivAider, click here.


WRITTEN BY SAM BLANCO, MSED, BCBA

Sam is an ABA provider for students ages 3-12 in NYC. Working in education for ten years with students with Autism Spectrum Disorders and other developmental delays, Sam has developed strategies for achieving a multitude of academic, behavior, and social goals. Sam is currently pursuing her PhD in Applied Behavior Analysis at Endicott College.

Pick of the Week: NEW! Caterpillar Token Board – Reinforce and monitor behavioral success

Reinforce and monitor behavioral success with our brand new Caterpillar Token Board, a versatile chart that’s perfect for focusing on a specific task, behavior, or goal. This week, you can save 15%* on your Caterpillar Token Board by entering or mentioning promo code CATERP1 online or over the phone during check-out.

With a cute, furry friend, kids will be motivated to work and stay on task both at home and in school. Use the Caterpillar Token Board for a short-term goal, such as helping your child sit still at the dinner table, or getting their homework done without complaining, as well as tracking long-term goals. This token board serves as a portable reward system to encourage positive behavior and reduce anxiety. The Caterpillar Token Board comes with 8 reusable reward stars, a magnetic strip on the back for easy display, and a Suggestion Guide. Measures approximately 9 x 5 inches.

Don’t forget to take 15% off* your order of the new Caterpillar Token Board by applying CATERP1 at check-out!

*Offer is valid until 11:59pm EDT on August 19, 2014. Not compatible with any other offers. Be sure there are no spaces or dashes in your code at check out!

Tip of the Week: Use Technology to Promote Social Interactions Between You and Your Child

Last month I had the privilege to speak in New Jersey at the 2014 Statewide Conference for Fathers of Children with Special Needs. I love the opportunity to speak with parents, and this conference allowed for lots of small group discussion that centered on the individual needs of each of the families represented there.

My focus was on utilizing technology, and one of the fathers said, “You know, I see what you’re saying about how I can use the iPad to increase social interaction, but my son won’t do that with me. When I try to work with him on the iPad, he just wants to go to Temple Run. He won’t play with it the same way he does with his teachers.” This question highlights the differences between the home environment and other environments. This is a common problem that parents face, not because they’re doing anything wrong, but because they have a different relationship with the child than the teachers do.

Go back to when you were in middle school. Imagine that you’re at home with your parents, you’re in your room engaged in one of your favorite activities, and your mother comes in and says, “Let’s watch a movie about how the solar system was created.” It is highly unlikely that you are going to leap at that opportunity. At home, you like to have your own space and free time, you have lots of choices for what you can do, and there are options that are more motivating than watching that movie.

Now think of the exact same situation, except you’re in your middle school science classroom and the teacher says, “Let’s watch a movie about how the solar system was created.” You never get to watch movies in that science class, you usually have to take notes and worry about when the teacher might call on you to answer a difficult question. It is much more likely that you are going to want to watch a movie in this scenario. Compared to the options you usually have during science class, watching this movie is highly motivating.

The same thing happens at home when you try to introduce an educational or challenging activity, and for learners with special needs, an activity we think of as fun may in fact be highly challenging. It’s important to acknowledge that parents are working with the child in a different environment so that we can create strategies that are feasible for creating success in the home. There are some things you can do to make it a bit easier on yourself when introducing iPad or tablet activities.

My biggest tip is to offer choices. For example, instead of saying “Let’s play on the iPad,” say, “Do you want to play Animal Race on the iPad or go outside and jump on the trampoline together?” This way, you’re labeling a specific app instead of providing free access and you’re creating an opportunity for interaction no matter what the child chooses.

My second tip is to utilize built-in accessibility tools. Use Guided Access to lock the app. This way, the choice really is to just play that app or select the other option presented. If the child selects the other option, that’s fine! You can let them know when they have free time on the iPad and when they only have the option of playing with a particular app. You can also limit the amount of time they play quite easily by going to your “Clock” app on the iPad or iPhone. Look at the menu of ringtones, scroll down to the bottom and select “Stop Playing.” Set the time, and when time is up, whatever app your child is playing with will automatically close. If you have a passcode set for your phone, then the passcode has to be typed in before access to the app is available again.

Some learners also respond very well to visual cues to signal when they have free time on the iPad versus structured time. This can be accomplished by changing the color of the iPad cover (my students know that the “orange iPad” is for structured time) or by placing a reusable sticker on the edge of the screen.

My final tip is to consider motivation. There are apps out there that I think are great, but I have to start with what my particular learner will be interested in and build from there. Find apps that have a characteristic that should appeal to your learner, such as specific cartoon characters, animals, or music.

Using these simple tips can provide some success in using technology to promote social interaction between you and your child, or between your child and his/her siblings and peers. If you’ve used other strategies successfully, please share them with us on Facebook.

Prompting Behavior Change: A Guest Post by Steve Levinson, PhD, Inventor of the MotivAider

We’re thrilled to bring you this exclusive article written by Steve Levinson, PhD, Inventor of the incredible MotivAider. We’re all familiar with the incredible versatility of the MotivAider in facilitating behavior changes and here, Dr. Levinson explains how behavior modification works. We’re so grateful to Dr. Levinson for this fantastic article. You can find more exclusive articles from leading experts in the field in our new catalog.

Prompting Behavior Change by Steve Levinson, PhD

If you’re a parent or a teacher who’s trying to change a child’s behavior, you’re probably frustrated. It’s not easy to change a child’s behavior. But before you blame the child, consider this: It’s not all that easy to change your own behavior either! Even when you have a good reason to make a particular change, and you’re really serious about doing it, changing your own behavior is rarely a snap.

Why it’s so hard to change behavior  So, what makes it so hard to change behavior? If you think it’s simply a matter of motivation, think again. Motivation is certainly important, but many behavior change attempts fail not because of insufficient motivation. They fail because of insufficient focus.

You can’t change your own behavior unless you can keep your attention focused on making the desired change. While it’s easy to do things the old way because the old way is automatic, doing things the new way requires focus.

Unfortunately, whether you’re a parent, a teacher or a child, it’s not easy to stay focused. That’s because, amazingly, the human mind has no built-in mechanism to keep our attention focused on making the changes we want to make. So it’s really no wonder that our good intentions keep getting lost in the shuffle.

If you’re not convinced that (1) focus is an essential ingredient in the recipe for behavior change and (2) we’re not well-equipped to stay focused on the changes we want to make, here’s an example that should help. Suppose you have a bad habit of slouching. You realize that slouching is not only bad for your back, it’s bad for your image. So you promise yourself that from now on that you’ll sit up straight and stand up tall. How hard could that be? Yet soon—very soon—after setting out to improve your posture, you’re right back to slouching.

So, what happened? Did you lose your motivation? No. You lost your focus! You failed to make a change you genuinely wanted to make because you simply couldn’t keep your attention focused on making it.Yes, it’s hard to change behavior because changing behavior requires focus, and none of us—not parents, not teachers and especially not children—are particularly well-equipped to stay focused.

So what can we do to stay more focused on the positive changes we want to make? And what can we do to help our children or our students stay focused on the positive changes they want to make?

Prompting: A simple way to facilitate behavior change  One solution is to use “prompting.” Prompting is a simple behavior change method that uses frequently repeated signals to keep your attention focused on making a desired change.

To illustrate how and why prompting works, let’s return to the posture example we used earlier. Only this time, after you promise yourself that you’ll sit up straight and stand up tall from now on, I’m going to follow you around and every few minutes—whether you’re slouching or not—tap you on the shoulder and whisper in your ear, “You’re no slouch.”

With me reminding you frequently, I guarantee that you’ll stay focused on improving your posture. What’s more, soon I’ll be able to stop whispering because just feeling the tap on your shoulder will be all it takes to send you the associated message, “Yes, I’m no slouch.” Sometimes when you feel the tap, you’ll find yourself slouching, and you’ll straighten up right away. Other times when you feel the tap, you’ll notice that your posture is already fine. It doesn’t matter whether you catch yourself slouching or you catch yourself with perfect posture. Either way, you’ll be making progress in replacing your bad posture habit with a good posture habit. Before long, you’ll automatically be sitting up straight and standing up tall.

Fortunately, there’s a more practical and even more effective way to use prompting. Instead of relying on a dedicated person to follow you around and keep tapping you on the shoulder, all you really need to implement basic prompting is a timer or other mechanical or electronic means that’s capable of sending you frequent private signals automatically. The process is simple. First, you devise a brief personal message that urges you to make the change you want to make. Then, you associate the personal message with the signal—the same way we associated “You’re no slouch” with a tap on the shoulder in the example above. The result is that whenever you receive the signal, you’ll focus your attention on making the change you want to make. And by making certain that you receive signals often enough, you’ll stay focused.

Prompting isn’t magic, but it can do amazing things. What’s more, because it allows us to overcome an obstacle that all of us—parents, teachers and children—share, it’s remarkably versatile. The same simple method that can be used to help a young child do a better job of staying on task can also be used to help parents and teachers consistently stick to an effective technique they forget to use when they’re busy or frustrated. The same simple method that can be used to help a child make a constructive keystone change in her social behavior can also be used to help parents and teachers stay cool, calm, collected, and constructive when interacting with a defiant child.

Introducing a New Support for the Child with Autism: The Acoustical Support

This week, we bring you a guest post from Martha Gabler. She’s going to share her experience with using an acoustical support to mark desired behaviors known as Teaching with Acoustical Guidance (TAGteach). The sound made by the acoustical marker (the click or ping) is sometimes referred to as a “tag.” TAGteach is based on the scientific principles of Applied Behavior Analysis and uses positive reinforcement and reinforcement schedules to build functional behaviors.

Hello. My name is Martha Gabler and I am the parent of a nonverbal teenage boy with autism. The purpose of this article is to introduce you to another type of support for children with autism that is coming into practice, and to ask you to consider it. There are many “supports” available nowadays for children with special needs. Most people are familiar with the adaptive equipment for children with physical disabilities: special chairs, grips, work platforms. In the autism community, most people are familiar with visual supports: picture systems, schedules, token boards, and so forth. These visual supports play a crucial role in educating children with autism and have proven to be extremely useful in both home and school settings.

Introducing Acoustical Support

Box ClickersI would like to introduce you to another type of support: the “acoustical” support. An acoustical support is a neutral sound: a tap, click or ping. The acoustical support plays a crucial role in delivering positive reinforcement to a learner. The purpose of the sound is to inform a learner that he has done something right. The sound says, “YES, you did it.” The instructor, therapist or parent makes the sound at the exact moment that the child has performed a desired behavior. This behavior may be pointing to a picture of a cat, putting a puzzle piece into place, or, one of those rare beautiful flashes of meaningful eye contact or comprehension. As soon as the child has performed the task and the instructor has produced the sound, the child receives a treat (reinforcer). After a few trials, the neutral sound becomes a “conditioned reinforcer.”

Why is the Conditioned Reinforcer Important?

“A conditioned reinforcer is some initially meaningless signal—a sound, a light, a motion—that is deliberately presented before or during the delivery of a reinforcer,” explains behavior scientist, Karen Pryor. After a few experiences of hearing the sound and receiving a treat (reinforcer), the sound itself becomes meaningful for the child, and he starts to watch out for it. After the child is paying attention to the sound, he starts to pay attention to the behaviors that produced the sound. When he realizes that his own behaviors are producing the sound and the reinforcer, he learns to produce those desired behaviors more often. At that point, you have learning and communication. This use of a sound to signal success to the learner is called Teaching with Acoustical Guidance or TAGteach.

As a parent, when I started using a neutral sound (a click) to indicate to my son which behaviors of his would earn treats, he started doing more of those behaviors. My son was loud, chaotic and wild in the early years. He had self-stimulatory and aggressive behaviors. With my conditioned reinforcer (sometimes referred to as an “event marker” or a “tag”), I was able to tag my child every time he did something good. “Good” things were behaviors like Quiet Mouth, Both Feet On The Floor, Hands Still, or Eye Contact. The procedure is: Observe child, press clicker (tag) when child performs the desired behavior, then reinforce child (give a treat or token).

Tantrum Busting

The first time I ever used TAGteach (acoustical support), my son had just erupted into a tantrum, complete with shrieking, stomping and storming about. I tagged every split second that he had “Quiet Mouth” or “Both Feet On The Ground, and handed him a tiny piece of candy with each click. Twelve minutes later he was sitting quietly and calmly on the sofa, and we were able to go about our day. It was an incredibly empowering experience for me, compared to all the previous tantrums when I always felt panicky, demoralized and helpless. I never feared a tantrum or meltdown again because I had a powerful tool to help him calm down.

My Son Became More Skilled and Happier the More I Tagged

The more I communicated with my son via tags and positive reinforcement, the more skills he gained and the happier and better behaved he became. Despite the lack of speech, despite the sensory issues, the click rang loud and clear and told him he had done something good. He loved it and responded beautifully. He had many difficult behaviors, but I was able to tag a split second of a good behavior whenever it occurred, with the result that the split second became two seconds, then three seconds, then four seconds of the desired behavior, plus it occurred more often. Gradually I was able to “shape” disruptive behaviors into positive learning behaviors, and he gained many useful skills.

The Tag is Clear and Precise with No Emotional Baggage

The reason the tag (conditioned reinforcer) works so well is because of the precise information it provides to the child. It tells the child, in real time, exactly what he did that was right, at exactly the moment he did it. From the viewpoint of a child with autism, he receives precise, timely information from a neutral sound; there is no emotional burden, language processing or sensory issue to deal with. Thus the child is free to focus on the priceless information he is receiving: the wonderful knowledge that he has done something right.

The Time has Come for TAGteach

The time has come for the use of acoustical supports in the autism community. There are many reasons: this methodology is based on the scientific principles of Applied Behavior Analysis; it is effective, easy to learn, easy to do and low cost. It is flexible, portable and wonderful for teaching in the natural environment. It is an invaluable tool for weary, dispirited parents, and for over-burdened instructors in the classroom.

Thank you for reading to the end of this article! In the beginning of the article I asked you to consider this method. I hope you are now interested in learning more about using acoustical supports for a child with autism. There are links below with more information. If you have questions, please contact me via the website below. Best wishes to you all.

Martha Gabler and her husband are the parents of two sons. When the younger son turned three, autism entered their lives. The method described above, using an acoustical support to mark desired behaviors, is known as Teaching with Acoustical Guidance (TAGteach). The sound made by the acoustical marker (the click or ping) is sometimes referred to as a “tag.” TAGteach is based on the scientific principles of Applied Behavior Analysis and uses positive reinforcement and reinforcement schedules to build functional behaviors. Martha’s book describing how she used TAGteach with her son is entitled Chaos to Calm: Discovering Solutions to the Everyday Problems of Living with Autism.

For more information about using acoustical supports with autism, see www.autismchaostocalm.com.

For more information about Teaching with Acoustical Guidance, see www.tagteach.com.

Tip of the Week: Using a MotivAider to Help Parents Give Positive Reinforcement

Several years ago I worked with an eight-year-old girl named Stella in her home. Gina, her mother, was at her wit’s end. She had Stella, a four-year-old daughter, and an 18-month-old son to care for plus household duties, balancing work and home life, and maintaining her marriage. She constantly felt stressed, which was compounded by the fact that Stella was not yet speaking or communicating any needs beyond what she wanted to eat, was still not toilet trained, and made a mess everywhere she went. Gina felt that she spent her days following Stella around the house, picking up after her, and yelling at her to stop. She frequently would find Stella dumping out a bin of toys or sweeping all the books off of a shelf, then try to distract her with a Youtube video or a snack.

At this point, Gina was feeling hopeless.

DRT_382_MotivAiderSo you can imagine that she was highly skeptical when I suggested that using the MotivAider, a simple device that vibrates at timed intervals, might make her life easier. And while she was prepared for me to try to change Stella’s behaviors, she was not expecting me to suggest she change some of her own behaviors. However, she decided to give it a try.

She set the MotivAider to vibrate every two minutes, then clipped it to her waistband. Her instructions? Every time she felt it vibrate, she should go find Stella. If Stella was engaging in appropriate behaviors (sitting calmly, looking at a book without damaging it, playing with a toy she enjoyed, or watching a video) Gina would give her some positive reinforcement. This included but was not limited to giving her hugs, presenting a snack, watching the video with her, or bringing up her favorite Youtube videos if she was doing something else. If Stella was engaging in an inappropriate behavior, Gina would ignore it (as long as Stella was not in any danger.)

To Gina’s surprise, Stella quickly stopped dumping out bins of toys and making a mess all over the house. All Gina needed was an easy reminder to catch Stella doing something good.

The MotivAider is one of my all-time favorite tools. You can program it to vibrate on a fixed or variable schedule at different duration and intensity levels. I use it for many things, but I’ve had great success in using it with parents. It’s easy for them to use independently, they can use it even when I am not present, and it fits into their busy lifestyles.

Many parents (and teachers) get stuck in the same cycle as Gina did, consistently reinforcing undesirable behaviors by providing attention whenever those behaviors are present. With the help of the MotivAider, Gina was able to change that contingency. (It should be noted that this intervention would not work as described above for a behavior that is not maintained by attention.)

While I was brought in to help change Stella’s behavior, we also changed Gina’s behavior. When we started, Gina provided reinforcement to Stella at every two minute interval in which she found her behaving appropriately. Over time we increased that interval, so that Stella wasn’t receiving such a high rate of reinforcement.

Gina reported that the house felt more calm now, and she had more energy during the day. It also gave her a confidence boost. Having success in this one area made her feel more hopeful and invested in creating success in other areas. Other families I’ve used it with have experienced similar results. One simple tool can lead to massive change for a family.

**Names and identifying characteristics have been changed to protect the identities of my clients.

Tip of the Week: Always Be Pairing

Yesterday, we introduced you to Sam Blanco, BCBA-extraordinaire and Different Roads’ wonderful new consultant. Today, we’re thrilled to commence her new weekly segment, the “Tip of the Week.” We’re sure you’ll find them to be as interesting and insightful as we do.

TeacherStudentHighFiveAlways Be Pairing

If you are familiar with ABA, you have probably heard of the term pairing. The idea behind pairing is that you will establish and maintain a positive relationship with the child by pairing yourself with preferred items or activities. Pairing is important not only in establishing a relationship with a learner; but also in maintaining the relationship, preventing boredom, and increasing motivation throughout your relationship with the child.

Below we address four common misconceptions with pairing.

Common misconception #1: Pairing only takes place when you are building a relationship with the child.

Many therapists I’ve supervised tell me that they pair for the first 1-4 weeks, then start teaching. But pairing shouldn’t end there (nor should it necessarily take so long as we’ll see with common misconception 2.)

Before each session, you should engage in “pre-session” pairing. This means that you are providing free reinforcers without placing demands. For early learners you might start off a session with blowing bubbles or playing with a parachute. For older learners you might start off a session with a game or sharing a book the child enjoys. Usually, it’s a good idea to present the learner with options during pre-session pairing. Involving choice frequently increases motivation, and it also increases the likelihood of delivering a more highly reinforcing item.

Some people feel that pairing every session eats up valuable instructional time. However, pre-session pairing increases motivation and cuts down on maladaptive behavior, which actually increases the amount and the quality of your instructional time for a given session.

Common misconception #2: Pairing takes a long time, and a provider or teacher should not start placing demands until the pairing process is complete.

In some cases, pairing may take a long time. However, in many cases, you are able to start placing demands during the first session. This does not mean that you’ll necessarily start doing discrete trials on the first day, but you can begin placing simple demands to build instructional control while you are pairing. It’s helpful for gaining instructional control to incrementally increase the number of demands placed across sessions, while always starting with a pre-session pairing session.

Unfortunately, pairing is not an activity that can be measured, and it’s important to recognize that the pairing process is never complete.

Common misconception #3: Pairing should involve sensory toys because all children with autism are highly motivated by such toys.

For some learners, sensory toys are highly motivating. However, a common error is using the same pre-session pairing with every learner. What you believe is reinforcing in general may not be reinforcing for your learner in particular. If the learner is not engaging with the item, ignoring it, putting it down, or displaying maladaptive behaviors when the item is presented; then the item is not reinforcing.

Another consideration is that big aspect of pairing is that the learner associates these motivating items and activities with you. While it is beneficial to be the purveyor of fun sensory items; it may be even more beneficial to engage in activities with the learner, such as cause and effect toys or games or physical activity that requires your involvement.

Common misconception #4: A learner will always be motivated by the same items.

Several times when a provider calls me to come in and assist with behavior problems, I discover that there is not enough novelty within their pairing sessions. A learner may love a marble run one session (which happens to be one of my all-time favorite toys) then have no interest the next session. Or, what I see much more often, is that the learner loves the marble run for two months, then suddenly has no interest in it. The provider or teacher is uncertain about what happened and depended too heavily on that reinforcer. Then, without a powerful reinforcer to use throughout the session, the learner displays a drop in motivation and sometimes an increase in maladaptive behaviors.

There’s a word for this: satiation. Learners display a wide range of satiation levels. Some learners you work with may satiate on reinforcers within minutes, while other may prefer to see the same items over and over from session to session. A learner’s satiation can vary based on many different variables, so you should be prepared to address it.

One way to address this is to choose not to bring the same reinforcers to each session. This way, if a battery dies, you forget to bring a favorite toy, or something breaks you have not set yourself and your learner up for failure. A second way to address satiation is to remove the item while the child is still motivated to engage with it, instead of waiting until he/she has lost interest before introducing other choices.           

When pairing is consistent, specific to the child’s interests, and involves a variety of items and activities learners will maintain motivation and you will be more easily able to maintain instructional control.

Pick of the Week: Parachute Play

DRG_350_Parachute_PlayAs Fall creeps up and school looms near, we thought this week’s pick should embody the carefree and playful aspects of summer. Within a few short days, our regular school-day routines will start up again and the memories of sand squishing between our toes and summer BBQs will fade. So celebrate these final days with one of the most simple yet fun games around – the Parachute! This week, save 15% on our Parachute Play by entering the Promo Code BLOGPP13 at checkout. It measures 6 feet with 6 handles so you can play one-on-one or involve the whole family.

And if you’re feeling like you should be focusing on school readiness and not play, well the Parachute can help there too! Here’s a post by our brilliant friend Sam Blanco on her Teachthrough Blog about all of the educational uses of the simple yet wondrous parachute.

Age level: Preschool, Early Elementary
Description: I still remember how excited I would be when the teacher brought out a parachute during elementary school. Even now, I can’t exactly identify what it is about a parachute that draws children in, but I have found that it almost always works even for my most difficult to motivate students.

Skills & Modifications: There are many things you can do with a parachute. I’ve listed a few below, but if you have used it in other ways, please leave a comment explaining the activity!

  • Manding (Requesting) – I frequently use a parachute to have my early learners mand for actions. For example, I’ll have the learner lie down on the parachute, then they have to mand for me to “pick up the handle,” “swing,” ready set “go,” or “stop.” I also use the parachute (or a blanket) to teach early learners with autism how to request a parent’s attention. I will have the parent hide behind the parachute, and when the child says “Mommy” or “Daddy” the parent will drop the parachute so he/she is immediately visible and give the child lots of attention in the form of tickles, kisses, verbal praise, etc.
  • Comparisons/Adjectives – To help students understand the concept of big and little, I will have the children stand around the sides of the parachute holding onto it with their hands. I will place an object on the parachute, and we will bounce the parachute up and down to try to get the object to fall into the hole in the center of the parachute. Some objects will fall, but some will be too big to fall into the hole. I will ask the students why the object fell or did not fall.
  • Sorting – I will place several colorful objects on the parachute. We will then bounce the parachute up and down playfully. After a 30 seconds to a minute, we will put the parachute back on the floor, and the student will have to move each object onto a panel of the parachute that matches in color.
  • Identifying body parts – Because the parachute has a hole in the middle, I will sometimes use it for identifying body parts. The learner can lie down on the floor. Then I will put the parachute on top of them. I’ll pretend I’m looking for them (for example, “Where is Charlie?”) Then I’ll position the parachute so that one part (such as their hand or their nose) is clearly visible. I’ll lightly touch it and say “What is that?” and have the student label nose or hand or elbow, etc. Once the learner has an idea of the game, I may let them initiate it, or have them say “Find my nose” and I’ll place the parachute so their nose is visible.
  • Song Fill-ins – I like to sing songs while shaking or spinning the parachute. For students with autism or other language delays who struggle with this skill, the parachute can be a great motivator to help with song fill-ins and other intraverbal skills. I will sing the song while shaking or spinning the parachute, and I’ll stop singing AND moving the parachute when I want the child to fill in a word. As soon as the child fills in the word, I will begin singing and moving the parachute again. For many students, this is more motivating than a high five or saying “good job.”
  • Quick Responding – If you are working with learners with autism, the absence of quick responding is sometimes a serious barrier to learning. I have found that using the parachute isa  good way to motivate the student to respond quickly when presented with at ask by using it as described above with the song fill-ins. Once I am getting quick responding with the parachute, I quickly begin to work on generalizing the skill to other environments (such as the table or during a floor activity.)

Pros: There is a wide variety of activities that you can do with a parachute. As mentioned before, my experience has been that it is a great tool for motivating students who are difficult to engage. The parachute is also fantastic as a reinforcer or to use during a break. It is fun for students to play hide-and-seek with it, lie on the floor and have you lift the parachute high into the air then bring it down on top of them, or spin it in a circle. One final pro is that, depending on the size of the parachute, you can do these activities indoors. I have a parachute that is six feet in diameter, which is perfect for indoor activities with preschool and early elementary learners.

Cons: You have to think carefully about the environment in which you will be using the parachute and choose the appropriate size. Many parachute activities also require more than two people, so if you are working 1:1 with students, you should prepare ahead of time to ensure that a sibling or parent will be available to participate in the activity with you.

Remember, enter the promo code BLOGPP13 at checkout to save 15% on our Parachute Play this week only.

***This expires September 3, 2013 at 11:59 pm EST. Not compatible with any other offer. Be sure there are no spaces in the promo code at check out!

Pick of the Week: MotivAider

It’s the best tool available for people of all ages to stay focused and change behavior and habits quickly, easily and privately. The MotivAider is one of our bestsellers for behavior modification of all sorts. The MotivAider is a simple electronic device that vibrates at timed intervals to provide an individual with a private prompt to engage in a specific behavior. You can program it to vibrate on a variable or fixed schedule at different durations and intensity. There’s a wonderful article and review on the uses of the MotivAider by our friend Jenn over at Toys are Tools that explores how some students and teachers are using the MotivAider in their classrooms.

This week only, you can save 15% on the MotivAider by entering the Promo Code BLOGMTVT at checkout. If you’ve always wondered just what the MotivAider can accomplish, here’s your chance to try it at a great discount.


*Offer expires on July 17, 2012 at 11:59 pm EST. Not compatible with any other offer. Be sure there are no spaces after the Promo Code when you enter it at checkout.