“Cool” versus “Not Cool” – Strategies for Teaching Students with ASD by Autism Partnership

Cool” versus “Not Cool”

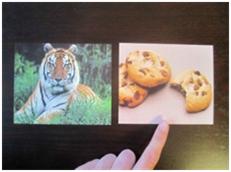
Children understanding appropriate versus inappropriate behaviors and correct versus incorrect responses are a fundamental aspect of intervention.  When children can recognize these distinctions it can help change their performance.  And when it can be taught in a fun way it can help motivate children them not only to acquire the information but to use it in their everyday life.

This discrimination can be used to teach a variety of concepts.  We have used it to successfully teach children to reduce self-stimulation and acting out behaviors.  Children have also learned pro social behaviors such as personal boundaries, recognizing when they are boring peers and empathy through this strategy.  Voice modulation and even articulation have improved through “cool/not cool”. 

There is nothing magic in the words “cool” or “not cool”!  Use words that are appropriate for age, level of understanding or that are common used among peers.  For example, you could use “good idea” vs. “not such a good idea” or “great” vs. “not so great”.  Instead of words teachers could use thumbs up vs. thumbs down or a smiley face vs. a sad face.

This is part of a guest series by Autism Partnership founders Ron Leaf, John McEachin and Mitchell Taubmann. Established in 1994, Autism Partnership is one of the nation’s premier agencies dedicated to providing intensive behavior intervention for children with autism and their families. They offer a comprehensive program and a variety of proven services, including in-home, in-classroom and one-on-one, as well as lectures and workshops. All programs are handled by expert staff and tailored to each individual child, family and caregiver, with the goal of helping that child achieve their best life. For more information, visit www.autismpartnership.com.

Pick of the Week: Reading Comprehension Practice Cards

While most of our products cater towards early language development and social skills, do you know that we also offer educational materials for students who are developing academic skills and early reading? This week’s pick highlights our Reading Comprehension Practice Cards. These are ideal for practicing critical reading and auditory processing skills. One deck focuses on Inference and the other on Cause & Effect. Each card consists of a leveled reading passage and a multiple-choice question that asks the student to infer meaning from the text. You can always adapt it for early or non-readers by reading the passages aloud and developing auditory processing skills.

This week only, save 15% on the Inference and Cause & Effect Reading Practice Comprehension Cards by entering the Promo Code BLOGRC2 at checkout.

*Offer expires on January 24, 2012 at 11:59 pm EST. Not compatible with any other offer. Be sure there are no spaces after the Promo Code when you enter it at checkout.

Strategies for Teaching Students with ASD: A Guest Series by Autism Partnership

We can’t tell you how excited we are to introduce a series of guest posts by Autism Partnership. Really, they don’t need any introduction: Ron Leaf, John McEachin, and Mitchell Taubman have been working in ABA since the 1970’s when they were all  working with Lovaas on the seminal UCLA Young Autism Project. They’ve dedicated their careers to providing services, training and direct intervention to individuals with ASD. It’s a rare to treat to get insight and information from such distinguished professionals.

In this  series, they’ll offer up strategies and tips on Learning How to Learn, “Cool” vs. “Not Cool”, Teaching Interactions, Reinforcement Development, and Individualized Token Economy Systems, as well as results from a recent study that shows promising treatment results in children with ASD. But first, an introduction in their own words:

The three of us met over 35 years ago on the UCLA Young Autism Project.  Our careers have been devoted to helping children, adolescents and adults develop the skills and behaviors so that they can enjoy the highest quality of life.  Although Applied Behavior Analysis remains the foundation of our approach the application has evolved.  This evolution has been due to a number of factors including working with a range of ages (toddlers, children, adolescents and adults) working in a variety of settings (clinics, homes, schools, private practice, residential and vocational settings) and not only working with Autism Spectrum Disorders but a large variety of populations (ADHD, Mental Retardation, Juvenile Delinquency, Prader Willi Syndrome, Schizophrenia as well as adolescents and adults  being challenged by depression, anxiety and marital conflicts).  Our journey has been challenging, exhilarating and humbling.

When we wrote our first book, Work in Progress, we believed it was our last book.  We had believed we would have nothing more to contribute!  However, years later we were frustrated that ABA was not being used to help students in schools so we wrote It’s Time for School.  But the insanity and misinformation regarding ASD and ABA compelled us to write It Has to Be Said!   It provided through grumpy men a chance to enlighten the world according to our belief system!  We weren’t quite done!  Recently, we recognized that lack of emphasis on teaching social skills so we wrote Crafting Connections

We have also been passionate of conducting research so as to objectively validate our approach.  We have conducted numerous research studies investigating various techniques and procedures.  Through these efforts hopefully we have contributed to the field.  But we know the research has made us better clinicians.  It has also provided evidence as to the efficacy of ABA.  Recently we published a 10 year outcome study allowing us to evaluate our approach.

In this Blog we would like to share a summary of our most recent programs and findings.  We hope that you will find them interesting and perhaps even helpful.

Cheers,

 John, Mitch & Ron

Toilet Training Tips

So, I’ve taken to spending the majority of a weekend when necessary, with families when it comes to toilet training their child.  It’s highly glamorous, really.  Just the mom, the dad, the child and me cooped up in the family bathroom for six or more hours at a time.  I brought donuts on the second day just in case anyone was in need of a morale boost since I left the parents on their own at the end of the first day.  They had a fresh pot of coffee on and were still in good spirits.  All kidding aside, it’s really the only way to do it.  During the weekend you are free from the week’s distractions and you have the entire family there for carry over, which in the long run is the deciding factor in a child’s success and generalization.  So, while I’ve been helping families with toilet training for years this was the first time I spent two full days helping to implement the protocol.  I thought I could share with you my general tips from years of experience along with some new insights from my newest adventure in toileting that I like to call the “weekend warrior”.

 First, we will start with the general tips:

 Prepare, prepare, prepare! This means talking about toileting every chance you get.

  • Learn your child’s routine (when do they typically “go”)
  • Watch videos about toileting
  • Read books or social stories about toileting
  • Use a doll for pretend toileting
  • Allow your child to watch you use the toilet
  • Provide opportunities to “try” without any pressure

 Gather materials. You want to have it all before starting.

  • A comfortable potty seat that fits over the toilet
  • A footstool for resting their feet and providing postural support
  • Data sheets
  • A timer
  • Lots of underwear!
  • Highly preferred snacks and drinks
  • As many reinforcers you can identify as highly motivating

 Several days before you begin:

  • Increase fluids to make sure child is well hydrated
  • Eliminate access to all items identified as highly preferred reinforcers to maintain potency

 What did I learn?

  • Adherence to the protocol is important but above all there needs to be a discussion regarding what makes the most sense for the family.  This was more apparent to me than ever having been in the home for so many consecutive hours.  For example, I feel strongly about going straight to underwear from diapers without using an intermediate type of coverage.  However, the stress of cleaning up possible accidents resulted in anxiety on the part of the parents, which in turn led to stress on the child (reducing success).  So, after two days in underwear we went to pull-ups and guess what, the child kept it dry the majority of the time!  This experience should be a collaborative partnership with the family, whatever protocol you are using; if it doesn’t make sense to the parent it won’t work.  It is our job as providers to individualize the plan for each family in a way that empowers them without compromising the core details of the protocol. 
  • I also feel rather strongly about starting on the regular potty instead of a little child potty.  However, we ended up doing a combination of both with great success.  It turns out that the child did better with the postural support provided by the child potty.  Since, he didn’t show any fear surrounding the use of the actual toilet we decided it was ok to use the potty and later transition to the toilet. 

If you think your you and your child are ready these are my “go to” references.  Best of luck!

Azrin, N.H., and Foxx, R.M. Toilet Training in Less Than A Day. New York, NY: Pocket Books, a division of Simon & Schuster, Inc., 1976. 

Kroeger, K. and Sorensen, R. (2010), A parent training model for toilet training children with autism. Journal of Intellectual Disability Research, 54: 556–567. doi: 10.1111/j.1365-2788.2010.01286.x.  (Click the title to download the full article).


From Basic Vocabulary to Building Sentences in Autism Education: Using Picture Cards

With our current pick of the week being the Language Builder Picture Cards, we thought this wonderful post outlining specific uses for the set from creator Angela Nelson would be most helpful.

The most popular use of the Language Builder Picture Card Series is to build vocabulary. The realistic and current photos help students to learn the name of various nouns, occupations, and emotions. In the beginning, this task can be very repetitive and basic, focusing only on learning single-word responses. When a child with autism begins to gain expressive language skills, parents and educators are thrilled to watch these new words emerge.

Labeling Sentences

After a child has mastered numerous single-word labels for the picture cards, the next critical step is to build these one-word answers into more complete and functional Labeling Sentences.

Building sentences will start simply. As a first step, you may just ask the child to use the article along with the word. For example, move toward an answer of “an apple” or “a car.” The next step would be to work toward “It is an apple,” or “It is a car.”

As you expand your student’s communication skills to include full sentences, you will no doubt need to use prompts in the beginning. The most common method is verbal modeling. But it is important to fade the verbal prompt as soon as possible. To help your student answer in full sentences without need for a verbal prompt, you can move to a visual cue prompt.
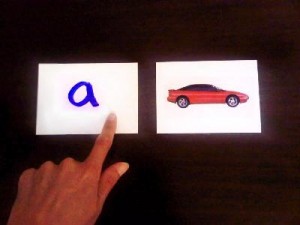
Written cue cards are a great method to remind your student to use full sentences. For example, if you show your student a picture of a car, and ask “What is it?” your student is likely to just answer “car.” To prompt your student to use the article “a” with the word car, you can start by putting a cue card in front of the picture with the word “a” on it. Have your student touch each card (the “a” card and then the picture card) as they say the words “a car.” The next step would be to add cue cards for “It is a car.” When your student starts to grasp the concept of speaking multi-word sentences, you can begin to fade the visual cue card prompts.

Requesting Sentences

Another important type of sentence that your child will need to learn to use is a Requesting Sentence. When your child learns to use communication to make requests and get their needs met, it will reduce the child’s frustration, which will in turn reduce the frequency of tantrums and outbursts.

Sort through the picture cards for which your child knows the labels. Find pictures of items that your child likes and that you have available to give to them. Food items are often the most successful to start with. For example: Cheese, Raisins, Juice, Popcorn, and Apple. Stick a magnet to the back of each picture and place the pictures on the refrigerator. Write the word “I” on one index card and the word “want” on another and place those on the refrigerator also. When you know your child wants a specific food (as most parents often do), pull the corresponding picture down into the “I want” sentence. Use the visual cues as a prompt to help your child remember to use the full sentence to request their desired food. As always, you should fade the prompts as your student begins to master this full sentence activity.

A Note on Using Cue Cards to Prompt

You may think: Why am I using written words to prompt my child? He isn’t speaking well, so why should I assume he can read?
The cards are not meant for your child to read. They are merely place markers. It makes as much sense to use the words as anything else. However, you could also use something as simple and nondescript such as blocks or blank cards for your child to touch as they say the words. The idea is to give your child a physical reminder to speak the extra words. In fact there are schools of thought suggesting that if you tie spoken words to physical activity that it creates more neural pathways for the words to attach to. Regardless, you can choose to use the word cards, or to use a more neutral object. Decide what works best for your child.

Additional Activities to Develop Sentence Skills

Labeling and Requesting are the most basic of all full sentence activities, and provide a basis for your student to understand that communication requires more than single word utterances. The following list of activities offers just a few examples of the many lessons you can use to help build full sentences and a more complete system of communication with your child.

Adjectives

You can use picture cards to discuss adjectives or descriptive words. Some adjectives are clear from the pictures, such as “the apple is round” or “the frog is green.” Other adjectives draw more on a child’s real-world experience, like “the bunny is soft” or “the banana is sweet.” To teach adjectives, you can start with a receptive task. Place cards in front of your child and ask them to “find something green” or “point to something that is round.” This receptive language activity will allow your student to hear some of the adjectives you use, before trying to come up with their own descriptive words when you start to build sentences with them.

 To transition this activity to expressive language, you can hold up a picture and ask your student, “What color is the frog?” You will need to prompt your student at first either verbally or using a cue card method as described above.

Wh-questions

Picture cards provide a great opportunity to practice “Wh” questions. You can show your student a picture and ask him or her to answer questions such as “What color is the frog?” “Where would you find a plate?” “When do you use a pillow?” “Why do you use soap?”

To start, some of these questions will fall easily out of the Adjectives lessons you have already practiced, such as “What color is it?” Other questions will provide a new challenge for your student.

Tell Me About

Use pictures with which your student is already familiar. The best pictures will be the ones you have practiced extensively on the Adjectives and Wh-Questions. Show your student a picture and ask him or her to tell you about the item in the picture.

The first things that your student should be able to tell you about the pictures are the responses that they learned in Adjectives and Wh-Questions. The difference with this drill is that you student has to generate the content themselves rather than respond to your question. When you ask your student “What color is it?” they know color is the relevant detail. In the Tell Me About lesson, students have to decide for themselves that color is a relevant thing to tell you about the picture.

You can start with scripted responses, using the picture to cue your student. Then you can progress to more creative responses that might not be so obvious from the picture. For example, show your student a picture of a duck. Ask your student, “Can you tell me about a duck?” By looking at the picture, your student can get some basic answers. “A Duck has feathers.” “A duck has webbed feet.” “A duck has a bill.” As your student becomes more familiar with this activity, you may progress to things about a duck that are not readily apparent from the picture. “A duck can swim.’ “A duck says ‘quack quack,’” “A duck lays eggs.”

The Tell Me About Lesson also gives you the opportunity to increase the length of your student’s verbal activity. Start by requiring the student to tell you only one detail about the picture. Then move up to two, or three or more details. Of course, if you ask your student to tell you three things about the picture, you may have difficulty if they haven’t mastered counting skills. Here’s a trick: hand your student three blocks and have them toss a block into a bucket with every detail they tell you. This is a great way to help your student count their answers, and it makes it fun for them!

Storytelling

The next step in this language building series is Storytelling. Again, this activity builds on the previous lessons. Show your student a familiar picture card and ask your student to “Tell you a story” about the picture. The first elements of the story will likely be familiar from the Tell Me About lesson. For example:

“Tell me a story about a duck.”
“There was a duck, it had webbed feet, feathers, and a bill. The duck went for a swim in the pond, then it laid some eggs and said ‘quack quack’”

As your student’s language skills grow, so will the creativity of the stories!

Generalization

The setting in which you begin to teach language skills is very structured and formal. However these new skills will become more valuable as they generalize across time and setting, and with various communication partners. To help promote generalization, you can start by moving your therapy session to different places – starting even with different rooms in the house.

Next, it is important that the skills your child has learned in the formal therapy session be practiced throughout other aspects of the child’s life, such as during family time and at school. Make sure to bring the cardsto dinner, to the store, to school, etc. Whenever you communicate with your child, require the same full sentences that are expected during therapy. Stop and take the time to use the prompt cards if necessary.

Finally, keep good records and good communication channels open with all of the other professionals and family members in your child’s life. You can send a notebook back and forth to school, or perhaps start an electronic communication log to make sure teachers are requiring the same sentences, using the same words, and bringing in the same prompts as you are at home and in therapy. Consistency is a major key to building and generalizing successful language skills to help your child interact with the world around them.

Pick of the Week: The Language Builder Picture Cards

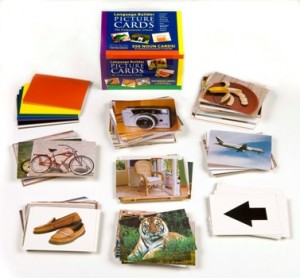
What more can we say? The Language Builder Picture Cards are the premier set of flashcards for any home or school program aimed at developing language skills. There are 350 beautifully photographed noun cards that take you through teaching and generalizing Animals, Foods, Vehicles, Furniture, Clothing, Toys, Everyday Objects, Shapes and Colors. The Language Builder is the first thing any parent or teacher needs to set up an ABA program and start teaching expressive and receptive language skills.

This week only, save 15% on the Language Builder Picture Cards by entering the Promo Code BLOGLB22 at checkout.

*Offer expires on December 27, 2011 at 11:59 pm EST. Not compatible with any other offer. Be sure there are no spaces after the Promo Code when you enter it at checkout.

Pick of the Week: Understanding Emotions

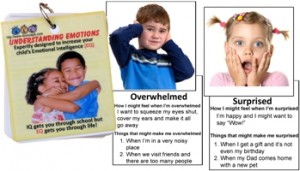
The holiday season can be filled with anticipation for children.  Understanding and being able to express their emotions  is important for being able to manage them. Understanding Emotions is a small, simple deck of flashcards that teach how various emotions feel and when they might occur. Emotions depicted include happy, sad, angry, frustrated, excited and more. The 30 cards come on a handy ring and can be removed to provide multiple learning options.
Save 15% this week only on the Understanding Emotions Flashcards by entering the Promo Code BLOGUE11 at checkout.

*Offer expires on December 20, 2011 at 11:59 pm EST. Not compatible with any other offer. Be sure there are no spaces after the Promo Code when you enter it at checkout.

Pick of the Week: Time Tracker Mini

We love this small, easy to program Time Tracker Mini! It’s a simple visual and auditory timer that has 360 degree viewing so it’s great for anywhere, in the classroom or at home. There are two simple dials: one for a total alarm time and one for the amount of warning time you’d like given before time is up. The timer turns green, yellow, then red as it counts down. The total alarm time can be set anywhere from 5 minutes to 2 hours in 5-minute increments.

Save 15% on the Time Tracker Mini this week only by entering the Promo Code BLOGTTM2 at checkout.

*Offer expires on December 6, 2011 at 11:59 pm EST. Not compatible with any other offer. Be sure there are no spaces after the Promo Code when you enter it at checkout.

Building Language for Your Child with Autism, Part 4: Building Expressive Vocabulary

This is the step where your child learns to actually say the words out loud. All of the tasks described in previous posts come into play when building your child’s expressive vocabulary. Picture cards are a useful tool again, because it just isn’t feasible to bring every object directly to your child. We certainly want them to learn the words bus and airplane, but it’s difficult to get those items into your living room!

The basic idea for building expressive vocabulary using picture cards is just to hold the card up and ask your child “what is it?” The intricacy comes in knowing how to prompt your child and how to fade that prompt. We talked previously about the importance of your child being able to imitate the words that you say. Imitation is the basis for the prompts you will use to build your child’s expressive vocabulary.

The first several times you ask your child the name of a new picture, you will likely have to model the word for him or her. For example, you ask your child “What is it?” If you do not get a response, you say “apple.” Ideally your child repeats the word “apple.” After a few tries, you can shorten your prompt to “app….” And then to “aaaa…….” And then perhaps to just opening your mouth as if to say “aaaa…” but not making a sound.

A Comprehensive Picture Card Library

It is a good idea to have a large selection of pictures ready to go when you start to teach the lessons we just described. Here are a few tips to help you choose or take appropriate pictures:

  1. Start with words that are familiar to your child. Words like apple, cup and cookies may be better than ­saxophone or stethoscope.
  2. Start with pictures on a plain white, or a distraction free background.
  3. Make sure to have duplicates available for the matching tasks when you first start out.
  4. Consider taking multiple pictures of the same item (6 different apples for example) to help your child generalize their newly learned words.
  5. As your child becomes more comfortable learning new words move to more natural settings for your pictures.
  6. Have a broad range of pictures, across multiple categories, ready for when your child is ready to move forward!
  7. If you take the pictures yourself, consider having them laminated for durability.If you don’t have the time to make your own pictures, a 350-Card Set of photo flash cards called the Language Builder Picture Card Set is avaibable and is specifically tailored to meet the needs of an early language vocabulary building program.


This is a part of a series of guest posts by Angela Nelson on building language in children with autism. As the creator of the acclaimed Language Builder Picture Noun Card Set, Angela received her BA and JD from UCLA where she studied and practiced behavior psychology under Dr. Ivar Lovaas. She has been creating autism and special needs curriculum products since 1997.


Building Language for Your Child with Autism, Part 3: Building Receptive Vocabulary

Receptive language refers to the thought process involved in hearing, processing and comprehending spoken language. When we mentioned above that a two year old child should be able to follow simple commands, point to objects when they are named, and recognize names of familiar objects; these objectives were examples of receptive language skills.

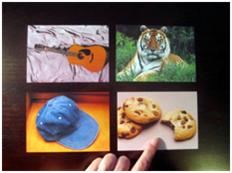
There are a number of ways to help build your child’s receptive vocabulary. Using photo cards is one basic and concrete vocabulary building tool that you can do at home. Place pictures of common objects on the table in front of your child. Ask your child to “touch the cookies” or “give me the hat.” When your child can follow the command and consistently select the requested picture, you have added a new word to their receptive vocabulary.

It is likely that your child will need help selecting the correct card… especially the first few times you try this task. Here is a trick to help make picking the right word easier. Start with just one card on the table and increase the number of pictures slowly. For example, if you are trying to teach the word cookies:


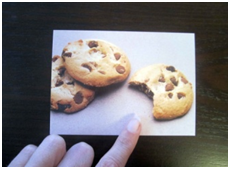
    1. Start with just the picture of the cookies on the table.
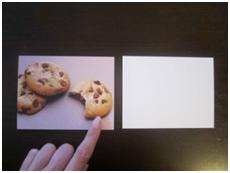
    2. After your child has learned to touch the cookies picture on request, add a blank card to the table. Ask your child to touch the cookies picture several more times, rotating the position of the two cards each time.
    3. Then, add a second picture to the table, and a third, and a fourth.
    4. Once your child can select the cookies picture each time, introduce new words using the same method!


This is a part of a series of guest posts by Angela Nelson on building language in children with autism. As the creator of the acclaimed Language Builder Picture Noun Card Set, Angela received her BA and JD from UCLA where she studied and practiced behavior psychology under Dr. Ivar Lovaas. She has been creating autism and special needs curriculum products since 1997.